CNC vs. 3D Printing for Drone Parts: Which Actually Delivers Better Results in 2026?
CNC machining and 3D printing both produce drone components, but they excel in fundamentally different scenarios. This head-to-head comparison breaks down strength, cost, speed, and surface finish so you can pick the right process for your exact use case — whether you're prototyping a racing quad or scaling production of commercial UAV frames.
For structural drone parts that face vibration, heat, and crash loads — motor mounts, arms, center plates — CNC machining delivers measurably superior strength and precision. For rapid prototyping, complex geometries like internal ducting, and low-volume custom housings, 3D printing wins on speed and design freedom. The real answer in 2026 isn’t “one or the other” — it’s knowing exactly which process to deploy for each component in your build.
The 30-Second Decision Framework
Before you compare specs, ask yourself two questions: Will this part bear structural load? and How many do I need? If the answer is “yes” and “more than a handful,” CNC is almost certainly your play. If the part is a protective shell, a sensor bracket you’re still iterating, or a one-off competition piece with wild topology — 3D printing gets you there faster and cheaper.
That framework alone covers about 80% of decisions. The remaining 20% comes down to material choice, tolerance requirements, and surface finish expectations — all of which we’ll break down below.
Material Strength: Why Layer Lines Still Matter
Here’s a number that settles a lot of arguments: a CNC-machined 7075-T6 aluminum motor mount retains the alloy’s full 503 MPa ultimate tensile strength. The same geometry printed in Nylon PA12 via SLS tops out around 48 MPa — roughly a tenth. Even high-performance PEEK prints sit near 100 MPa. Layer adhesion creates an inherent weak axis that no amount of infill optimization fully eliminates.
Anisotropy Is the Hidden Problem
3D-printed parts are anisotropic — they’re weaker along the Z-axis (between layers) than in the XY plane. For a drone arm experiencing multi-directional vibration at 400 Hz from a spinning motor, that anisotropy matters. CNC parts machined from billet stock are essentially isotropic, meaning strength is consistent regardless of load direction.
When 3D-Printed Strength Is Enough
Not every part needs aerospace-grade toughness. A GPS antenna mount on a survey drone sees minimal stress. A camera gimbal shroud protects electronics from dust, not from crash forces. For these components, even PLA+ at 60 MPa is overkill — and 3D printing delivers them in hours, not days.
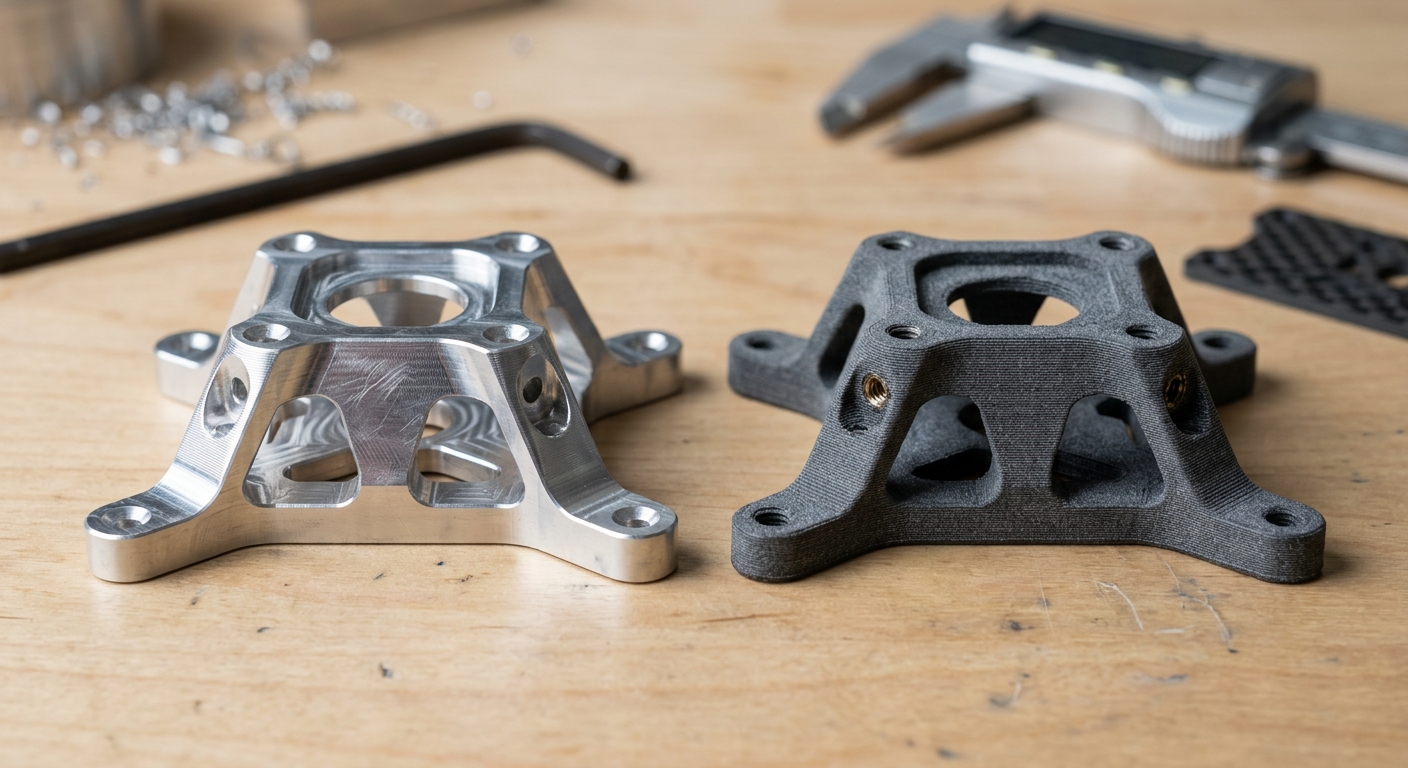
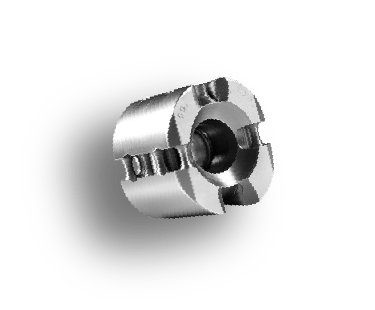
Comparison of CNC machined aluminum motor mount and 3D printed nylon motor mount showing surface texture differences
Head-to-Head Comparison Table
This table summarizes the key trade-offs across the criteria that matter most when selecting a manufacturing process for drone components. Bookmark it — it’ll save you hours of back-and-forth.
Criteria
CNC Machining
3D Printing (FDM/SLS)
Material Strength
Excellent — near-stock properties
Good — layer adhesion limits peak strength
Surface Finish
Smooth (Ra 0.8–3.2 µm typical)
Rougher (Ra 6–15 µm); post-processing needed
Per-Unit Cost (1–10 pcs)
Higher — setup & tooling costs
Lower — no tooling required
Per-Unit Cost (500+ pcs)
Lower — amortised setup
Higher — linear cost scaling
Lead Time (Prototype)
1–3 days
Hours to 1 day
Geometric Complexity
Limited by tool access
Nearly unlimited — internal channels, lattices
Dimensional Tolerance
±0.025 mm achievable
±0.1–0.3 mm typical (SLS/FDM)
Best Drone Application
Structural frames, motor mounts, arms
Canopies, ducts, sensor housings, prototypes
Notice the crossover at volume: 3D printing’s per-part cost barely drops as quantity rises, while CNC’s setup cost gets spread thinner with every unit. That crossover typically lands somewhere around 30–80 parts depending on complexity. Beyond that threshold, CNC wins on economics too.
Cost Breakdown: The Numbers Nobody Talks About
Most comparisons stop at “3D printing is cheaper for prototypes.” That’s true — but incomplete. Let’s look at actual numbers for a typical 120 mm × 45 mm drone arm plate in 6061-T6 aluminum (CNC) versus carbon-fiber-reinforced nylon (SLS).
Single Prototype
CNC: ~$45–$80 per part (includes programming, fixturing, material)
SLS Nylon-CF: ~$12–$25 per part (build prep, material, depowdering)
Batch of 200 Units
CNC: ~$8–$15 per part (setup amortised, cycle time optimised)
SLS Nylon-CF: ~$10–$20 per part (cost barely moves — each part still takes build volume and post-processing time)
The lesson? If you’re producing drone kits at scale, CNC machining’s unit economics crush additive manufacturing. But if you need five prototypes by Friday to test a new arm geometry, firing up a print farm is the obvious move.
Hidden Costs to Watch
Don’t forget post-processing. SLS parts need depowdering, vapor smoothing, and sometimes dyeing. FDM parts often require support removal, sanding, and acetone smoothing. CNC parts come off the machine ready to anodize. Factor in an extra $2–$5 per part for 3D printing post-processing at scale.
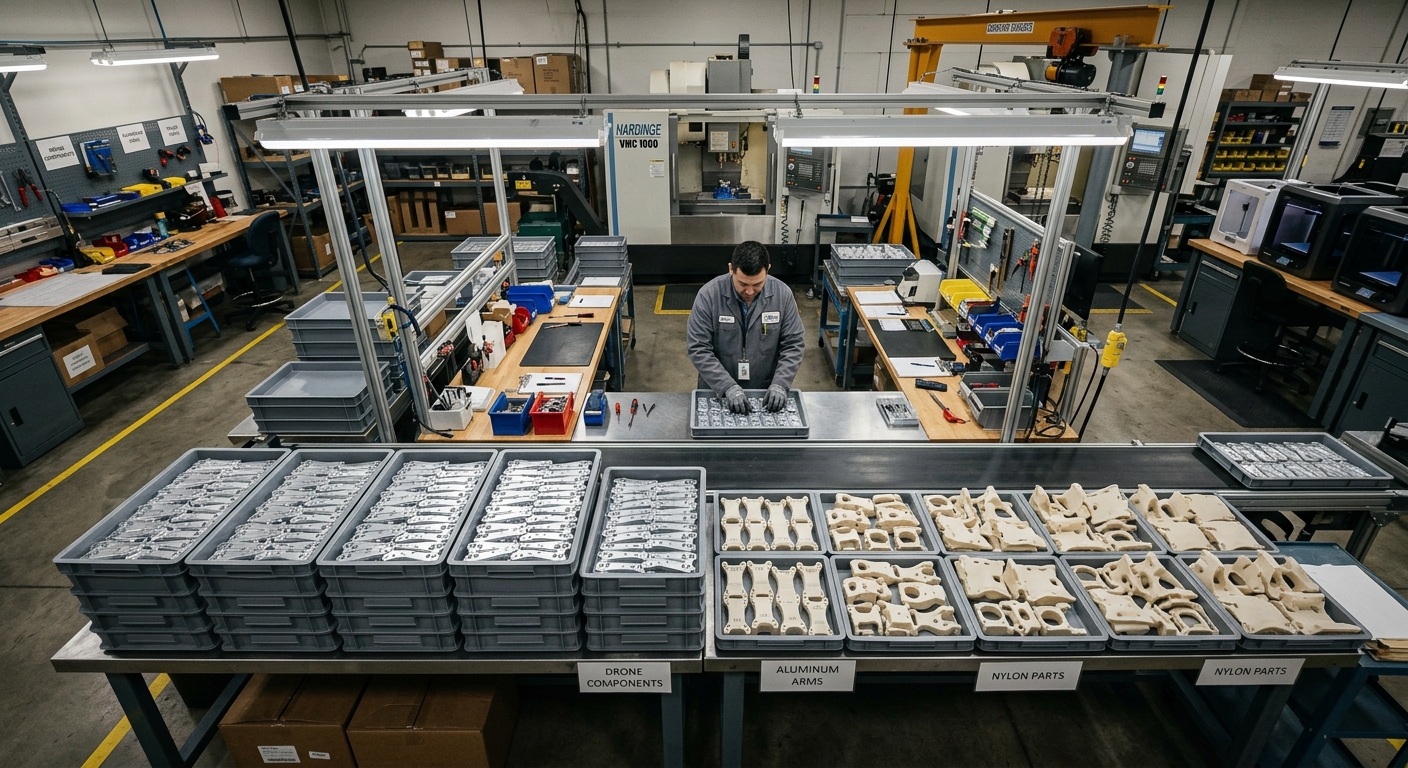
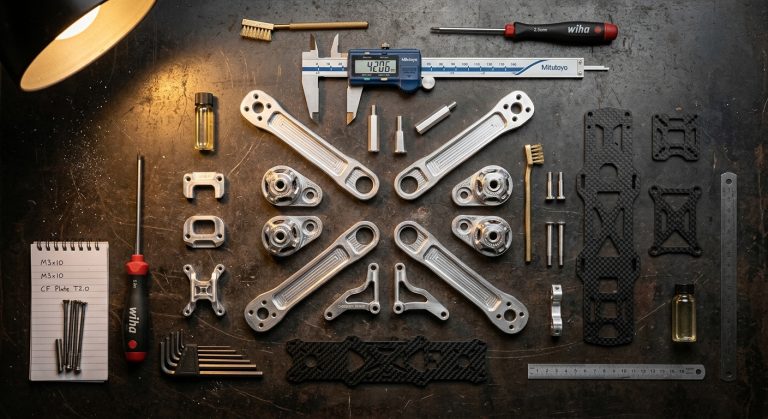
Production batch of CNC machined drone arm plates and SLS printed nylon drone parts in an industrial workshop
Tolerances and Fit: Where CNC Pulls Away
Drone assemblies rely on tight fits. A motor mount with 0.3 mm of slop introduces vibration harmonics that degrade flight controller PID tuning and shorten bearing life. CNC machining routinely holds ±0.025 mm on critical features — bolt patterns, bearing bores, press-fit interfaces. That’s an order of magnitude tighter than typical SLS tolerances of ±0.1–0.3 mm.
For instance, a commercial agricultural drone manufacturer we’ve worked with at Dronecnc Demo switched their motor mount production from SLS nylon to CNC aluminum specifically because bearing press-fits were inconsistent across print batches. The result: vibration dropped 40%, and motor bearing replacement intervals doubled from 200 to 400 flight hours.
When Tolerance Doesn’t Matter
A battery tray? A landing gear cover? These parts interface with velcro straps and zip ties — not precision bearings. Spending CNC money on tolerance you’ll never use is wasteful. Match the process to the requirement.
Design Freedom: 3D Printing’s Killer Advantage
CNC machines are subtractive — a spinning tool can only reach surfaces it can physically access. Undercuts, internal lattice structures, and enclosed channels require multi-axis setups or are simply impossible. 3D printing doesn’t care. Want a hollow arm with internal cable routing and a topology-optimized lattice that saves 35% weight? Print it.
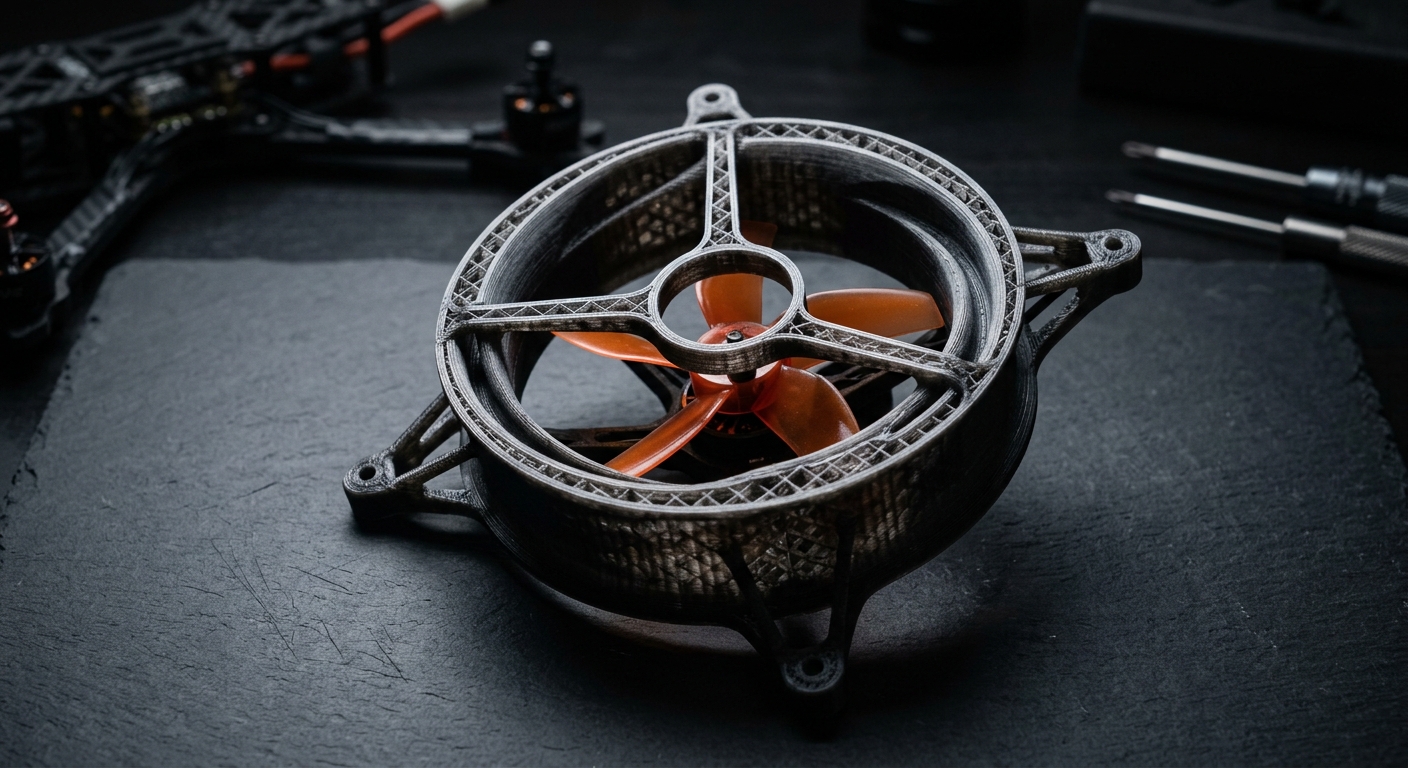
Real-World Example: Racing Drone Ducted Propeller Shrouds
A competitive FPV team designing ducted propeller shrouds for a sub-250g racing quad needed smooth internal airflow channels with variable wall thickness — thicker at stress points, thinner where weight savings mattered. CNC would have required the shroud to be machined in multiple pieces and bonded. SLS printing produced it as a single monolithic part in carbon-fiber nylon, weighing 18 grams versus the 31-gram CNC assembly. The performance gain was measurable: 6% more static thrust at the same RPM due to the smoother internal duct geometry.
This is where additive manufacturing earns its keep — parts that simply cannot exist any other way.
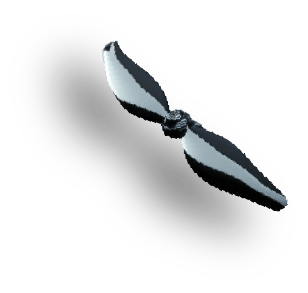
3D printed ducted propeller shroud for racing drone showing internal lattice structure
Material Options in 2026: More Choices Than Ever
CNC Materials for Drone Parts
6061-T6 Aluminum: The workhorse — good strength-to-weight, easy to anodize, affordable.
7075-T6 Aluminum: 40% stronger than 6061, preferred for high-stress arms and center plates.
Titanium (Grade 5): Extreme strength-to-weight for premium builds. Expensive to machine but unbeatable for crash-critical joints.
Carbon Fiber Composite (CNC-routed sheets): Dominant for flat plate frames — highest stiffness-to-weight ratio available.
3D Printing Materials for Drone Parts
PLA/PLA+: Cheap prototyping only — brittle, heat-sensitive.
Nylon PA12 (SLS): Tough, chemical-resistant, good for housings and non-structural parts.
PEEK/PEKK: High-temperature, high-strength thermoplastics now printable on production-grade machines. Approaching aluminum strength at 60% of the weight, but material costs run $300–$500/kg.
Metal (DMLS): Direct metal laser sintering in titanium or Inconel. Aerospace-grade but $150+ per part for drone-scale components.
The 2026 landscape has narrowed the gap. PEEK prints are genuinely competitive with aluminum for certain drone applications — but they cost 5–10× more per kilogram than 6061 billet. For most teams, CNC aluminum remains the pragmatic choice for structural parts, with SLS nylon-CF handling everything else. Learn more about our material capabilities on our resources page.
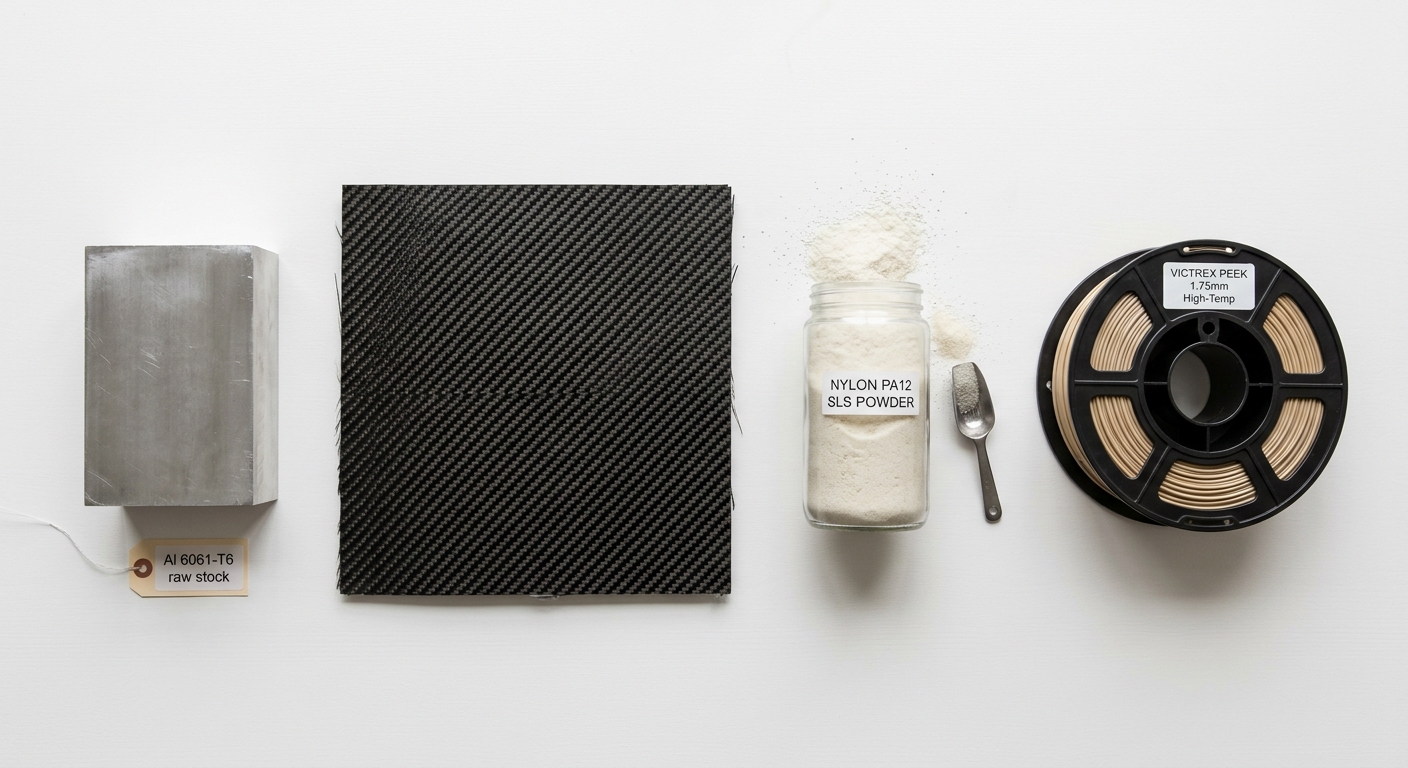
Flat lay of drone manufacturing materials including aluminum billet carbon fiber sheet and nylon powder
Hybrid Manufacturing: The Smart Approach Most Teams Miss
The best drone builds in 2026 don’t pick one process — they use both strategically. Think of it as a manufacturing portfolio: CNC for the skeleton, 3D printing for the skin and accessories.
A Practical Hybrid Build
CNC: Center plate (7075-T6 Al), motor mounts (6061-T6 Al), arm tubes (carbon fiber)
3D Print: Camera mount (TPU — vibration damping), antenna holder (PA12-CF), landing gear legs (PA12 — impact absorption), propeller guards (PA12-CF — complex geometry)
This split plays to each process’s strengths. The structural core is machined for precision and durability. The peripheral components are printed for speed, weight optimization, and design flexibility. A commercial inspection drone company following this exact approach reduced their total bill of materials by 22% compared to an all-CNC design, while maintaining the same crash-test certification standards.
If you’re planning a hybrid build and want guidance on which parts to machine versus print, reach out to our team for a design review.
Production Speed and Scalability
Speed means different things at different stages. During development, “fast” means getting a prototype in hand the same day. During production, “fast” means cycle time per unit.
Prototyping Speed
3D printing dominates here. An SLS build of a drone canopy takes 4–8 hours. FDM can deliver a test bracket in under 2 hours. CNC requires CAM programming (30–60 minutes for a new part), fixture setup, and machining — realistically a 1–3 day turnaround even at a responsive shop.
Production Speed
Once a CNC program is dialed in, cycle times are fast and repeatable. A drone arm plate machines in 8–12 minutes on a 3-axis mill. That’s 40–60 parts per shift from a single machine. An SLS printer producing the same part geometry needs 6–10 hours per build, yielding maybe 20–30 parts per batch (depending on nesting). CNC throughput scales linearly with machine count; SLS throughput scales with build volume and layer height.
For production runs above 100 units, CNC’s throughput advantage compounds. For runs under 20, 3D printing’s zero-setup advantage wins.
Making the Right Call for Your Drone Project
Stop thinking of CNC and 3D printing as competitors. They’re complementary tools, and the teams building the best drones in 2026 treat them that way. Machine your structural parts — frames, arms, motor mounts — where strength, tolerance, and surface finish justify the cost. Print your housings, prototypes, and geometrically complex components where design freedom and speed matter more than raw material properties.
If you’re unsure where the line falls for your specific build, that’s exactly the kind of question we help answer at Dronecnc Demo. Whether you need precision CNC components, guidance on hybrid manufacturing strategies, or a second opinion on material selection, our team has the manufacturing and drone expertise to point you in the right direction. Drop us a line — we’d rather help you pick the right process upfront than watch you remanufacture parts that didn’t perform.